The Ultimate OnlyFans Guide - How to Make Money On OnlyFans
What is OnlyFans? How Does OnlyFans Work?
How Much Can You Make On OnlyFans?
2.) Set a Username and Display Name
4.) Add a Profile Pic and Cover Photo
7.) Register a Second OnlyFans Account
9.) Set Your Subscription Price
11.) Enter Your Bank Account Info
12.) Enter Your Tax Info and Bank Info On Your Free Account
How Much Content Should I Make?
What Kind of Content Should I Make For My Free Account?
What Kind of Content Should I Make For My Paid Account?
Finding and Joining Drop Groups
Step-by-Step Example of a Drop
Saving Captions To Your Clipboard
The Ultimate OnlyFans Guide - How to Make Money on OnlyFans
What is OnlyFans? How Does OnlyFans Work?
OnlyFans is a website where creators post content and where fans can subscribe to creators, for a monthly fee, in order to see their content. Creators can also offer content that their fans must purchase individually, on top of their monthly subscription fee.
Creators get 80% of the revenue they generate, while OnlyFans keeps the other 20%.
The majority of creators on OnlyFans are models that create adult content, which is who this guide is for.
If you're looking to expand your revenue beyond OnlyFans, check out TUGTOM.
Should I Make an OnlyFans?
I can’t tell you how often I’ve heard the following - “I’d like to make an OnlyFans, but I’m just not pretty/young/skinny/busty enough to be successful.” Wrong! For one thing, there is enormous demand for women of all different sizes, shapes, colors, ages, looks, etc on OnlyFans.
Secondly, because so few models know about the marketing trick taught in this guide, it is so effective that anyone using it can be successful, no matter what they look like. In fact, I can say with confidence that the least attractive models on OnlyFans who use this marketing technique are making at least 10x as much as the most attractive models who aren’t. If you do happen to be an exceptionally attractive person, even better!
Keep in mind that this probably won’t always be the case. Big money attracts attention. As with countless other lucrative opportunities on the Internet in the past, the secret will eventually spread to enough people that it loses its effectiveness. The good news is that, if you start now, you will already have thousands of monthly subscribers and be set for life before that ever happens!
Can You Make Money On OnlyFans? How Much Can You Make On OnlyFans?
Most people actually make very little money on OnlyFans! In fact, at the time of this writing, about 90% make less than $500 per month. This is because most models think they can just sign up, post content, and then people will just start subscribing. This is not the case. You must bring the fans to you. This guide will teach you how to do just that, using a single marketing technique that you can repeat over and over, and you will quickly become one of the top models on the site!
Be aware, however, that your monthly income doesn’t start off huge. It must be built up month-by-month as you grow your subscriber count larger and larger. The good news is that, while it will start off small, if you follow this guide, it will grow very, very quickly.
Below is an example of what one model, who started OnlyFans about a year ago, made in each of her first 12 months by following the strategies taught in this guide. This example is not meant to illustrate what you will make, as that will vary greatly based on how much content you post, how often you promote yourself, and other factors. You could make a lot less than this or a lot more. Rather, it is meant to illustrate how your monthly income will rapidly increase month-by-month, so that you don’t get discouraged in the beginning:
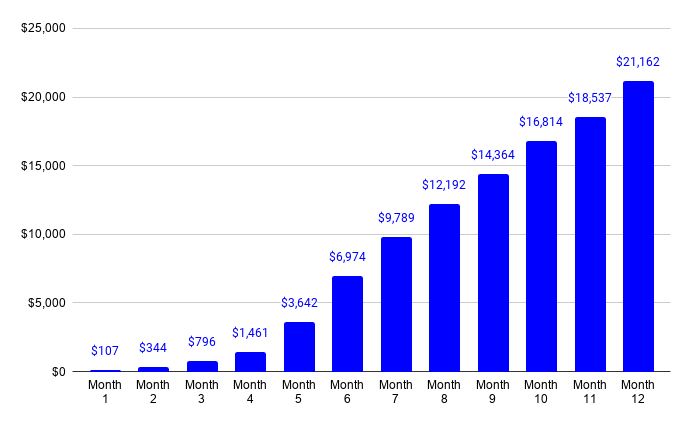
As you can see, even though this model barely made over $100 in her first month, by devoting only 10-15 hours per week to OnlyFans, she is now making over $21,000 every single month! And that number will continue to rise as long as she continues promoting herself!
The reason her numbers increased in the manner they did is because of the nature of OnlyFans’ subscription-based model. You earn some amount of subscribers in your first month, and then many of those subscribers will automatically resubscribe the next month! So then all the new subscribers you gain in the second month get added to those that rolled over from the first month. Then, in the third month, you are getting new subscribers plus two months of renewing subscribers, and so on. Additionally, as you get more subscribers, you can then cross-promote with models who have higher numbers of subscribers, and thus the number of new subscribers you get every month will go up and up as well!
Again, remember that the above is an example of just one model’s earnings. Results will vary greatly based on how much you promote yourself and how many of the strategies you use in this guide. If you don’t put in any time or effort, you will make much less than the above. But if you put in enough time, you can increase your income even quicker than the above!

Setting Up Your Account
1.) Register a New Account
Go to the OnlyFans registration page to register a new account. There is no standalone app for OnlyFans, you must use the website, but the interface is mobile-friendly.
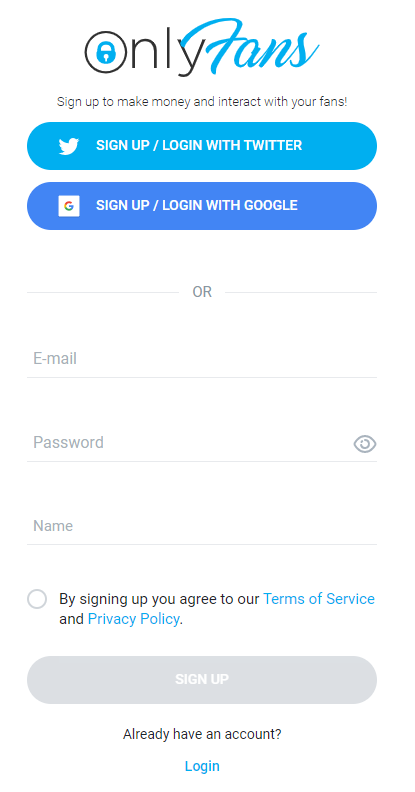
It’s best to use an email address that you only use for your modeling business, so you can keep your personal and business emails separate.
The Name field is your display name, not your real name. It can be changed later in the Settings at any time.
Getting your account set up properly can be difficult and OnlyFans support is not very good. Follow the rest of these instructions carefully.
2.) Set a Username and Display Name
OnlyFans contains a toolbar with the following five buttons:

These are generally found at the top of the screen on a PC and at the bottom of the screen on a mobile device.
The fifth button will open a side menu with several more links. On this menu, click on Settings.
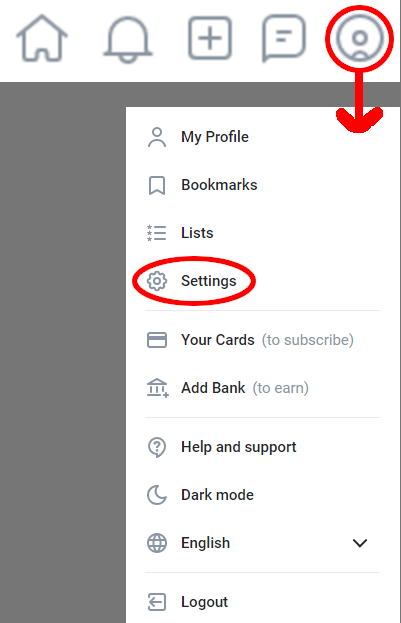
This will take you to the Settings > Profile page where you can set a username and display name.

Your display name can be changed often. Many models use it as a way to market themselves, so will put something like “Horny Asian BBW Milf - Fetish Friendly” for example, instead of their model name, but it’s up to you what you think will work best.
Your username should preferably only be set once, as links to your page are based on it. It is common to use your model name for your username, so if you go by Sally Sinner, for example, you would use @sallysinner.
Click the Save Changes button to save your changes.
3.) About Section
Use the About section (also in Settings > Profile) to talk about yourself and market yourself to potential fans. Let them know what kinds of content they will see if they subscribe.
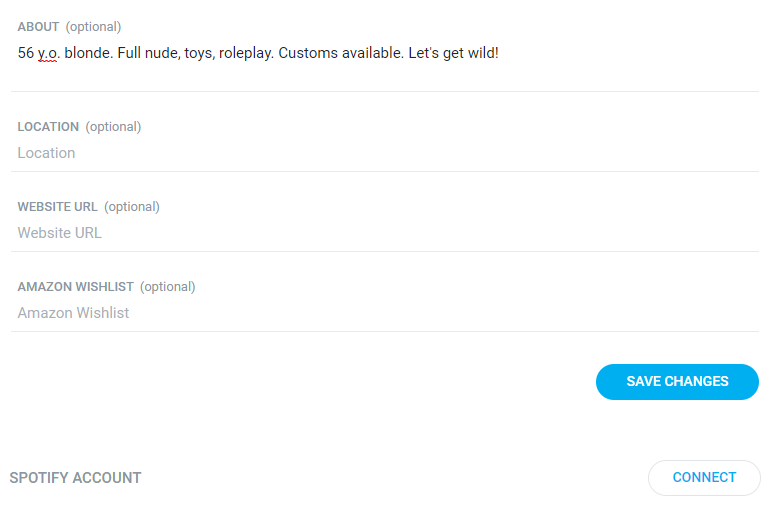
Despite what it says, the About field is NOT optional and IS required to get your account verified. Make sure to fill it out properly. If it is only a word or two and is not very descriptive, your account will be rejected.
The rest of the fields - Location, Website URL, Amazon Wishlist, and Spotify ARE optional and are NOT required to get your account verified. You can leave these blank.
Click the Save Changes button to save your changes.
4.) Add a Profile Pic and Cover Photo
Use the top of the Settings > Profile page to add a profile pic and cover photo. You MUST add a profile pic and cover photo in order to get verified. If you are a model, your profile pic and cover photo must be photos of you.
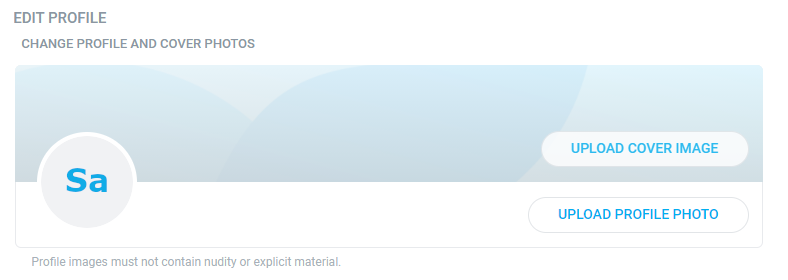
Your profile pic should ideally be a close-up of just your face, smiling, with your eyes clearly visible. Use your cover photo to show off more of your body.
As an example:

Nudity is not allowed in your profile pic or cover photo.
Click the Save Changes button to save your changes.
5.) Verify Your Email Address
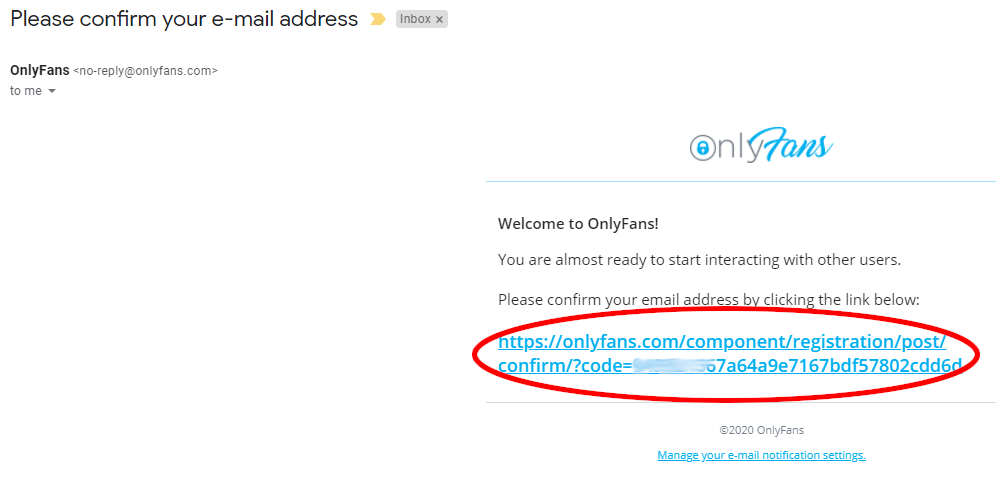
Check your email (the email address you used to register) for a message from OnlyFans. Click on the link in it to verify your email address.
If you don't see an email from OnlyFans, check your Spam folder. If you use Gmail, check to make sure it wasn’t sorted into the “Social” or “Promotions” folders.
If you still don't see the email, go back to the Settings page on OnlyFans and click on the @ Account link. On mobile devices, the link won’t have the word “Account” - there will only be the @ symbol.

On this page, click on the button that says “Confirm Your Email”.

Then click “Send Confirmation”. It can often take several minutes for the email to send. If it doesn’t send, try clicking the Send Confirmation button again after an hour. Sometimes when OnlyFans’ servers get backed up, it can take up to 24 hours for the confirmation email to send.
Again, check your Spam folder to make sure your email provider didn’t accidentally put it there. And if you use Gmail, check the “Social” and “Promotions” folders.
When you receive the confirmation email, click on the link in it to verify your email address.
6.) Submit ID Verification
Expand the side menu again, but this time, instead of going to Settings, click on “Add Bank”.
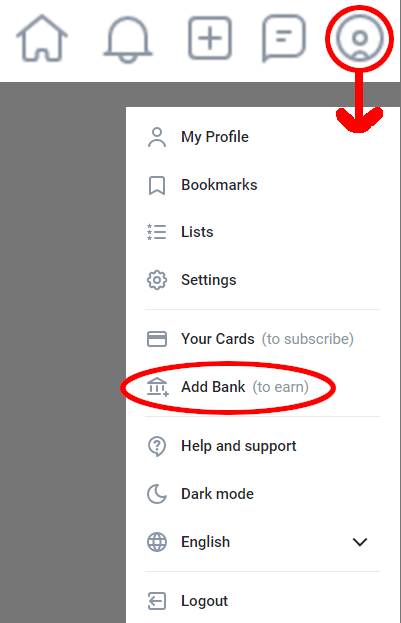
If your email has been confirmed, you should be taken to a page where it will ask for the country you live in. You MUST enter the country you actually live in. The country must match the country in the photo identification that you will send. The country must also match the country of the bank account you will send. This is only for verification purposes and won't be shown to your fans.

After entering your country, check the checkbox to confirm that you are at least 18 years old, then click the Next button.
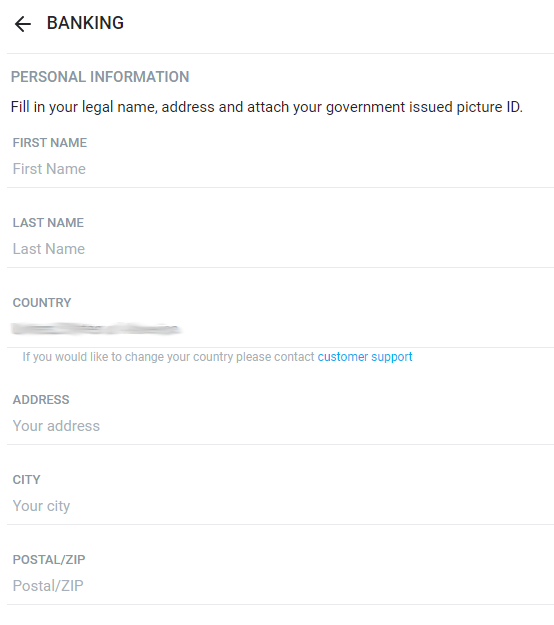
On the next page, you will be asked to fill out your personal details and provide photo identification. You MUST enter your real information here. This is only for verification purposes and won't be displayed to your fans. Enter your name and address EXACTLY as it appears on the photo identification you will use.
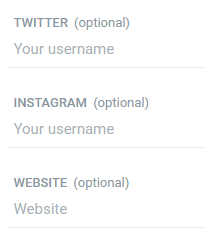
You MUST enter at least one of the following - your Twitter account, your Instagram account, or your website. This is only for verification purposes, so don't worry about using an account with personal details. Your fans will not see this information. If you don't have a Twitter or Instagram, create one, post a few pics, follow a few people, and then get a few friends to follow you.
Enter your real date of birth. This MUST match the date of birth in your photo identification. This is only for verification and won't be shown to fans.
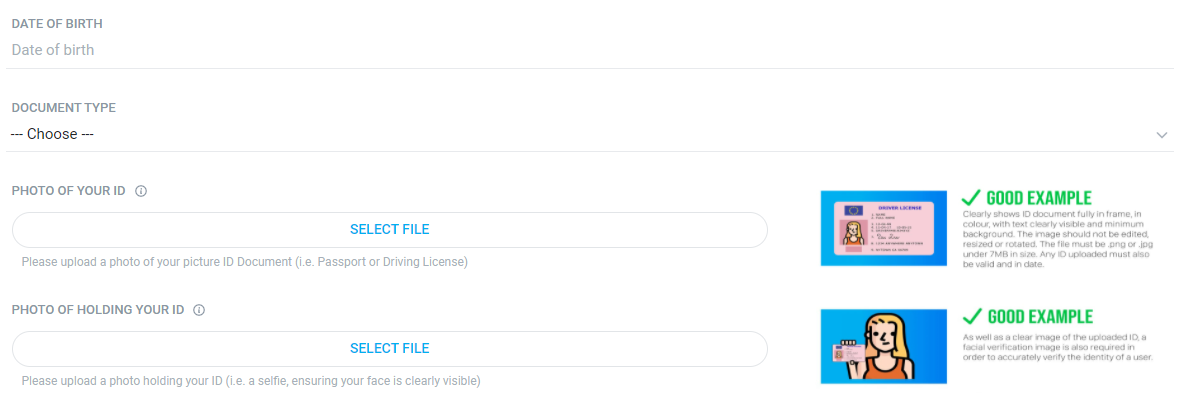
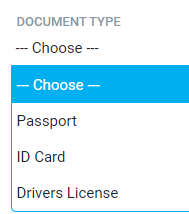
Now select the type of document you will use for your photo identification. If you are using your passport, select Passport. If you are using a document that authorizes you to drive a car, select Drivers License. For all other types of government identification, select ID Card.
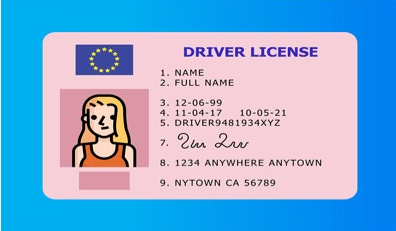
Now you need to take a photo of the identification document you selected. Make sure the entire document can be seen, but try to have as little background as possible. Make sure the text can be seen clearly. Don't edit, rotate, or resize the picture. The document cannot be expired. Here is an example:
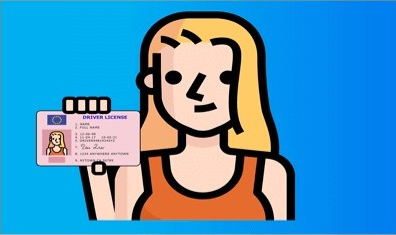
Now you must take a picture of yourself holding your identification document. Make sure both the identification and your face are clearly visible. This is very important! Do anything you can to make your face look similar to your face in the identification document. For example, if you are wearing glasses in the identification photo, wear those glasses. Wear the same shirt if you still have it. If you are smiling in the picture, smile. If you are not smiling in the picture, don't smile. And so on. Here is an example:
If your identification document has an expiration date, enter it in that field. If it does not have an expiration date, check the box that says "No expiration date."

Check the box that says "Will you be posting sexually explicit content" then click the button that says "Send for Approval."
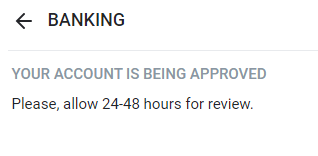
You should see a message saying that it will take 24-48 hours to approve your account.
7.) Register a Second OnlyFans Account
As part of the marketing strategy contained in this guide, you will need two OnlyFans accounts. A “Paid account” and a “Free account”. Your Paid account will cost fans a monthly subscription fee while your Free account will be free to subscribe to.
Your Free account will be used to attract more fans, who you can then sell content to and try to convert into paid subscribers.
The account you just created will be your Paid account. Now create another account to use as your Free account. This may sound frustrating to repeat everything you just did, but don't be discouraged! It will be easier this time, now that you have already done it once. And it will be worth it!
To create a second account, repeat steps 1-6. You will need to use a different email address than you did to register for the first account. If you need to create another email for this purpose, I recommend ProtonMail.
Set the username to be the same as your first username but add the word “free” to the end, such as @sallysinnerfree.

8.) Link Accounts
OnlyFans gives you the ability to link your two accounts in order to quickly switch between the two.
Go to Settings > Account. Look for the section that says “OnlyFans Accounts - Connect Another OnlyFans Account.” Whichever account you are currently signed into, enter the username of the OTHER account in the box here and click “Connect”.

You will now be able to quickly switch between accounts by clicking the drop-down arrow at the top of the side menu.

9.) Set Your Subscription Price
At this point, you must wait 24-48 hours for your accounts to be approved. You will receive an email once your ID verification has been approved. Once it has, you can set your subscription price and enter your tax and bank account info.
Login to your Paid account (the one that does NOT have “free” in the name).
Go to Settings > Profile.
Set your subscription price. I recommend $4.99 per month to make the maximum possible revenue. In my experience, higher prices tend not to make up for the fewer number of people that subscribe as a result. Plus, there are many other ways to get revenue out of a subscriber than just their subscription fee, as this guide will teach you.

10.) Enter Your Tax Info
On your Paid account, open the side menu and click “Add Bank”. You will see a prompt for filling out a tax form. If you live in the United States, the form will be a W9. For models outside the United States, you may have to fill out a different form, specific to your country.

For the W9 form:
Box 1 should have your real name.
Box 2 you can leave blank.
For Box 3, you should check “Individual/Sole Proprietor” unless you have created a corporation or LLC for your modeling business.
Box 4 you can leave blank.
Enter your address in boxes 5 and 6.
Box 7 you can leave blank.
Enter your Social Security Number.
Go down to the bottom of the page and click “Send.”
11.) Enter Your Bank Account Info
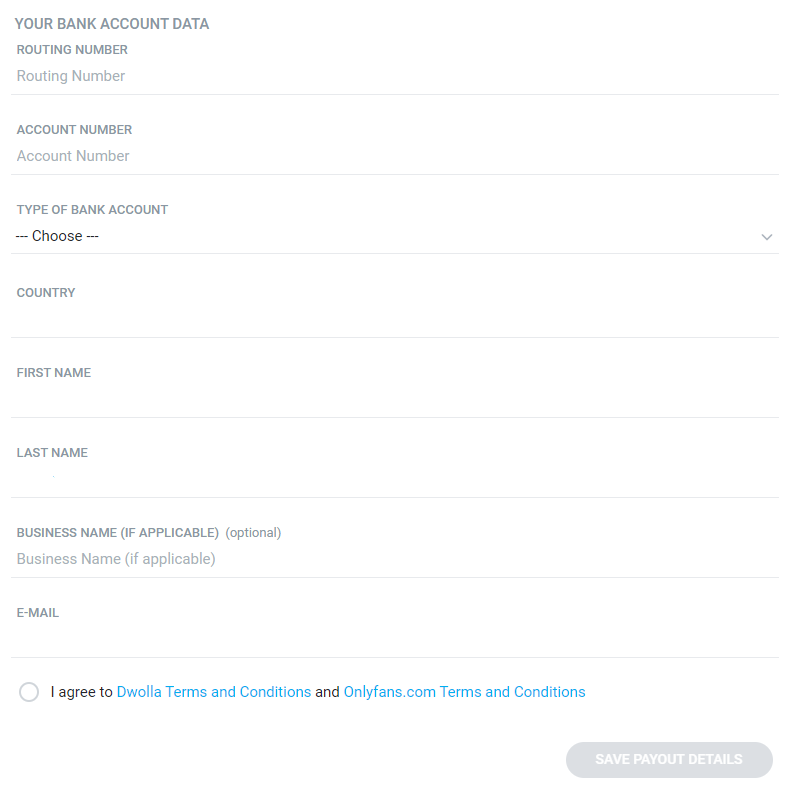
Once you submit the required tax forms, you will finally be able to enter your bank account information on the “Add Bank” page. Your name and country needs to match the name and country you used for verification.
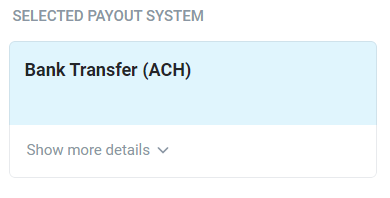
For Creators in the United States, your payout method will be Bank Transfer (ACH). You must enter the routing and account number for a checking or savings account.
For Creators outside the United States, the payout method will default to Direct Transfer (OCT). This method will transfer the money into your bank account via your VISA or VISA debit card. If you have a VISA card, you should use this method, because you can withdraw a minimum of only $20 and the processing time is only 3 days.
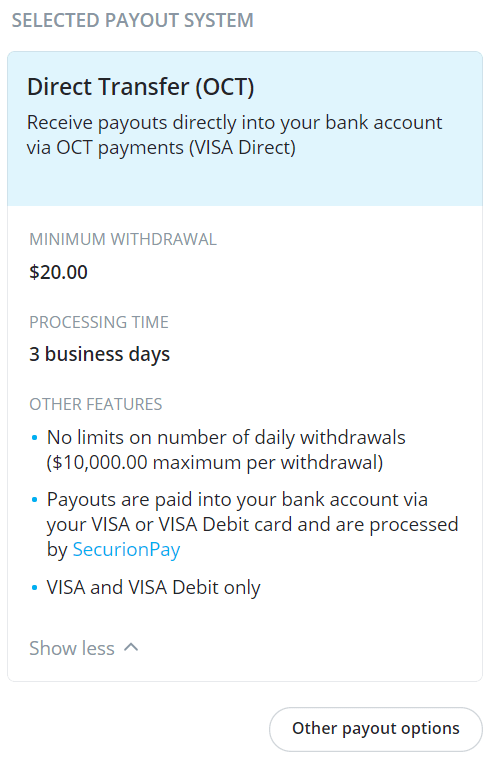
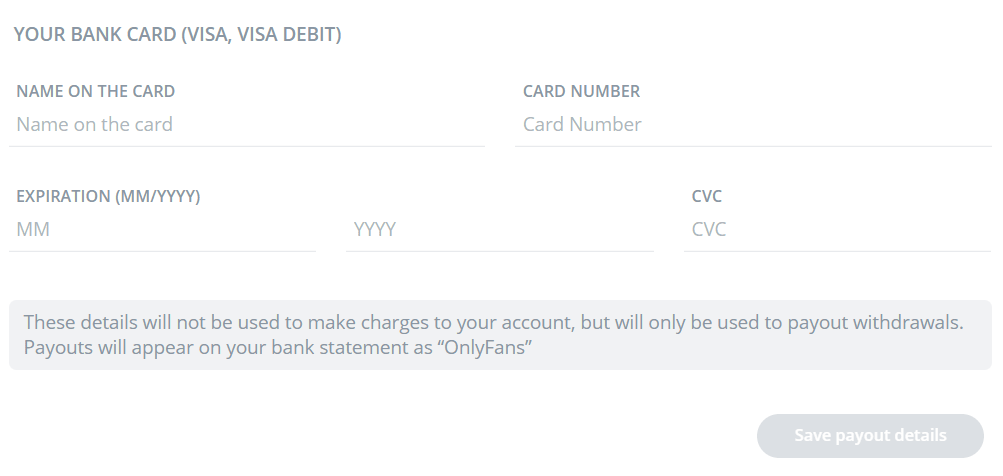
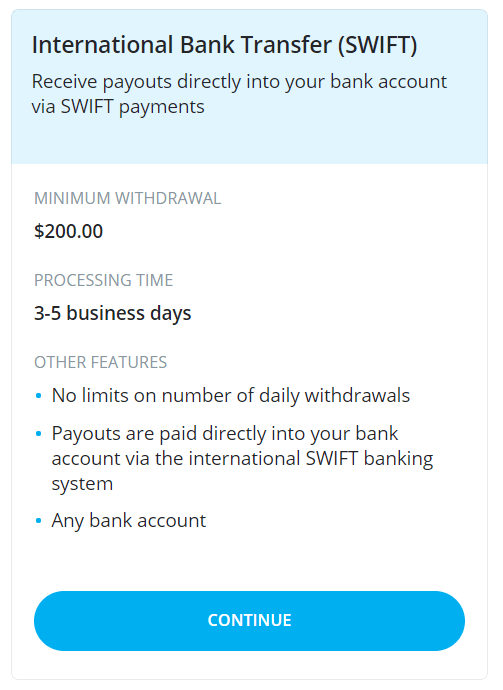
If you don't have a VISA card, click the button under the Direct Transfer box that says "Other payout options." Then select International Bank Transfer (SWIFT). This method has a minimum withdrawal of $200 and a processing time of 3-5 days, but it works with any bank account and you don't need to have a VISA card.
12.) Enter Your Tax Info and Bank Info On Your Free Account
Even though your Free account doesn’t have a monthly subscription fee, you can still sell content to your fans on this account, and can thus still make money from it.
Switch to your Free account and repeat steps 10 and 11.
Congrats!
Congratulations! Both of your accounts are now fully set up. In the next section, you will learn best practices for creating and posting content. Once you have some content up, you can finally get to the fun part - getting paid subscribers and making a lot of money!

Creating Content
How Much Content Should I Make?
Before you begin marketing, you will need some content. I recommend at least 10 pictures and 1 video on each account before you begin marketing. Of course, more is always better as potential fans can see the number of pictures and videos you have before subscribing.
For each account, you should strive to release at least 1 picture a day and 1 video a week. This isn’t as much work as it sounds. The key is to shoot content in bulk. Spending just a few days shooting content can produce enough to last you a long time. Also, the videos don’t need to be very long. For your Free account, I would recommend videos be between 30 seconds to 3 minutes. For your Paid account, I would recommend most of your videos be between about 2-5 minutes with maybe a 7-10+ minute video about once a month.
Note that if you go over 30 days without posting, OnlyFans will suspend your subscriptions until you post again.
In addition to the initial 10 pictures and 1 video, I recommend you have at least 1 week’s worth of content already prepared for each account so you have some time to focus on learning the marketing without being distracted by creating content. So that adds up to 17 pictures and 2 videos per account.
What Kind of Content Should I Make For My Free Account?
Nudity is not allowed on Free accounts, unless it is locked behind a paywall (see PPV Posts). The content on your Free account should all revolve around the following theme:
TEASE! TEASE! TEASE!
Your Free account should be overflowing with “tease.” It’s all about driving your Free subscribers crazy until they can’t help but subscribe to your Paid account, or purchase your locked content.
Ideas of things to post:
- Pictures and videos of you posing/dancing in sexy outfits, costumes, and lingerie
- Pictures and videos of you teasing nudity (pulling the clothing just “to the edge”)
- Censored pictures and videos from your Paid account
- Pictures of your face
What Kind of Content Should I Make For My Paid Account?
This is entirely up to you and what you’re comfortable with. Some models post simple nudes only, while others post a wide range of adult content. In general, of course, the more kinds of content you post, the more money you stand to earn, as you will cater to a wider range of what people want.
You will get messages from fans asking for certain content. If they ask for something you’re not comfortable with, just politely decline. As long as you haven’t advertised yourself as producing a certain kind of content, you are under no obligation to do so, even if they are a Paid subscriber.
In addition to pictures and videos, you can post audio. For example you could post audio clips of orgasms, dirty talk, ASMR, and ASMR dirty talk.
Also consider posting text-only posts of jokes or random thoughts that showcase your personality from time-to-time. When your fans get to know you as a person better, they are more likely to purchase your content and/or maintain their subscriptions. Just be sure not to post anything too personal that helps to reveal your real identity or location.
Shooting in Bulk
As mentioned earlier, the best strategy for producing content in the least amount of time is to produce a lot of it at once, then gradually release it, rather than trying to produce every day.
For example, consider the following strategy: model Sally Sinner picks out 7 different outfits to shoot in. She changes into outfit #1 and takes several pictures in innocent poses. Then she takes several pictures in more risque poses. Then she takes several pictures teasing nudity in various ways. Then pictures with slight nudity. Then with more explicit nudity (though still dressed in some form). Then she takes a video of her masturbating in the outfit. Then she takes a video doing a striptease in the outfit. Then she takes a video of her stripping out of the outfit.
Now she changes into outfit #2 and repeats the same exact process as above. After doing the same thing in outfits #3-7, she takes several fully nude photos in various poses. Then she films a video of her masturbating fully nude.
The next day, she repeats the same process as the day before, but in a different location, such as a different room of her house. The third day, she repeats the process again in a third location.
Sally now has a lot of content saved up, for both her Free account and Paid account, that she can release gradually. By spacing out the outfits and locations, she can keep the content fresh. For example, instead of posting a different picture of her in outfit #1 and location #1 for 30 days in a row, she posts one or more pictures with outfit #1 and location #1 on Monday, then outfit #2 and location #2 on Tuesday, outfit #3 and location #3 on Wednesday, outfit #4 and location #1 on Thursday, and so on.
By producing content in bulk, Sally now has much more time to concentrate on getting subscribers.
This doesn’t mean that all of your content should be produced in bulk, just most of it. If you get an idea or opportunity for a more unique picture or video that you believe will add value to your Paid subscription, don’t hesitate to shoot it just because it will only produce a single piece of content. You can also snap quick pics and vids throughout the day when convenient, like when you’re getting in or out of the shower, or just because you’re feeling sexy! Also, as mentioned before, you will, from time to time, receive requests from your fans for custom content that you can choose to fulfill.
Organizing Your Content
I recommend you organize your content into folders. At the very least, you should have a “Ready to be Published” folder and a “Published” folder. When you are posting something new to your account, choose from the “Ready to Be Published” folder, and once you have posted it, move that file to the “Published” folder.
If you usually edit your photos and videos before posting, you might also want a third folder called “Needs Editing.” After you finish editing the file, you would move it to the “Ready to be Published” folder.
Restricted Words
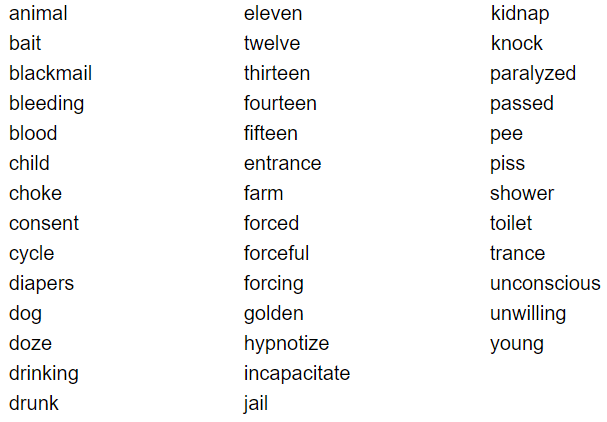
OnlyFans has an extensive list of restricted words. These are words you are not allowed to include in posts. Many of these words have completely innocent uses, so it can be very easy to accidentally use one. You won’t be instantly banned for honest mistakes, but the system will automatically block the post from being posted.
The following is a subset of restricted words which are commonly used in non-sexual ways:
The following is a subset of restricted words that have a sexual connotation but are commonly allowed on other adult sites:
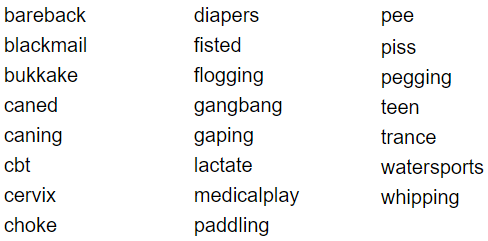
For a full list of restricted words go to https://jennacitrus.wordpress.com/2020/04/25/onlyfans-list-of-restricted-words/.
Restricted Content
While it doesn’t make much sense, you should know that just because a word is restricted, it doesn’t necessarily mean that that type of content is restricted. For example, the words “pee,” “piss,” etc aren’t allowed but, at the time of this writing at least, you’re still allowed to post a video with peeing in it.
Officially, the only thing the OnlyFans’ Terms of Service mentions about restricted content is that it can’t be “obscene” which, of course, is vague and up to interpretation. So, for now, I would use PornHub as a guide - if it’s not allowed on PornHub, it’s almost certainly not allowed on OnlyFans.
Remember, however, that this only applies to your Paid account - nudity and explicit content are NOT allowed on Free accounts, unless they are behind a paywall (see PPV Posts).
How to Post
There are two ways to start a new post. One way is to scroll to the top of the Home page and click in the box that says “Compose new post…”

The second way is to click on the New Post button  in the middle of the toolbar.
Whichever method you choose, you will now be able to begin typing and also have access to a group of seven buttons.

I will briefly describe each of these buttons below:
 - upload a picture or video from your device
 - select a picture or video you have already uploaded
 - record an audio message
 - create a poll
 - set the post to delete after a certain number of days
 - schedule a post
 - make it a Paid Post, meaning subscribers must pay to see the post
Once you have finished creating the post, simply press the “Post” button to post it to your account.
Scheduling Posts
There are two different methods you can use to schedule a post. The first is to press the Schedule Post button  and select a specific date and time for the post to be published.
The second method is to press the Schedule Post button and select “Save for Later.” Then, scroll to the top of the Home page and select “Queue.”

Then go down to where it says “Publish My Posts Saved For Later Every” and select how often you want your saved posts to be published.

If your goal is to post every day, you could set this to “24h since my last post” and it will post one of your “Save for Later” posts every day until there aren’t any left.
Note that scheduling posts can be a double-edged sword. While it definitely saves you time, because you get out of the habit of posting often, it can be easy to forget that it’s time to post more and you can end up going several days with no posts before you remember. I recommend scheduling posts for a week at a time (on Mondays or whichever day of the week will be easiest to remember) and then schedule a reminder using a Clock or Calendar app that will go off every week. But you have to decide for yourself what kind of posting routine will work best for you.
Equipment
If you shoot using your phone, and don’t have professional lighting equipment, I would highly recommend investing in a ring light. They will vastly improve the quality of your photos and videos.
I recommend this one but if that’s out of your budget, this one is decent as well.
Next Steps
Now that you have some content posted and some content saved up, it’s time for the fun part - building up your subscriber count and your income!

Getting Subscribers
There are several ways you can go about promoting yourself, but by far the most effective way is to cross-promote with other OnlyFans models. To find other models to network and cross-promote with, use social media, such as Twitter, Instagram, and Snapchat. And while you can also do cross-promotions on these networks (such as promoting each others’ Twitter accounts), the best way is to cross-promote directly on OnlyFans. This has the huge advantage of all the potential subscribers already having an OnlyFans account and already being on the site at the time they see the promotion!
Even if you don’t follow any of the other advice in this guide, follow the advice in this section. Regularly doing the cross-promotional strategies found in this section is what makes the difference between the hundreds of thousands of models making a small amount on OnlyFans and the small amount of models that are making hundreds of thousands of dollars!
Definitions
Here are some quick terms and abbreviations relating to OnlyFans cross-promotion that you should know. I will just give brief descriptions here and discuss them in more detail throughout this section.
S4S - Shoutout-for-shoutout (or share-for-share). A type of cross-promotion where another model makes a post promoting you on their page and you do the same for them.
drop - A type of cross-promotion where a group of models all do a S4S for each other at the same time.
caption - The promotional message used to promote a model during an S4S or drop. Each model writes their own caption and then you trade these with each other to post on your respective pages.
A - Active. Means that you are currently active and available for a drop.
L4L - Like for like. Another model likes a certain amount of posts on your page and you do the same for them.
SS - Screenshot
FC - Fan count
Shoutout-for-Shoutouts (S4S)
S4S is a simple and straightforward way for you to cross-promote with other OnlyFans models.
First, create your caption (promotional message). Make sure you have it ready before you start to message other models, in case the other model asks for it immediately. Your caption should include your attributes and kinks, the link to your page, and your username. If you’re promoting your Paid account, you can also choose to include your price and/or any promotions/discounts you are currently offering. For example:
The profile pic and cover photo of the account you link to will be automatically added to the bottom when the caption gets posted.
If the other model agrees to it, you may also want to consider creating either a collage of photos, or a 10-15 second promo video, to include with the shoutout. The video should be a compilation of clips of your best videos. Try to include shots of you at a variety of angles and doing a variety of things. If the shoutout is for a Free account, don’t include any nudity. Also, don’t include any couples or group content, because I’ve heard this can cause age verification problems when it gets posted to other models’ pages.
Once your caption is ready, find other OnlyFans models on social media and messaging apps such as Twitter, Instagram, Snapchat, and Telegram. Don’t message models directly on OnlyFans - most do not want to use the site itself for networking and will be annoyed. If you find a model on OnlyFans you want to network with, look in their bio for their social media links and contact them on one of those platforms.
Try to find models that are similar to you, either in appearance or content, or preferably both. Because that model’s fans like them, there’s a better chance they will like you too, compared to the fans of a model you are not similar to.
Then, send one of these models a message with a screenshot (SS), or a screen recording, of your fan count (FC) and ask them if they would be interested in doing an S4S. Don’t be offended if they aren’t interested, or ask for payment, because their fan count is higher than yours. If they are interested, you will discuss when to make the post, how long to leave it up, and then trade your captions and photos/video.
Once you post their shoutout on your page, take a screenshot of it (taking screenshots will be discussed shortly) and send it to them to show that you actually posted it. They will do the same.
You should also ask the model if they will add you as a friend on OnlyFans in exchange for you adding them as a friend. This is good for two reasons. One is that it makes your username a clickable link when it’s posted on the other model’s page. Two, you will gain subscribers who discover you while browsing that model’s friends list.
Telegram
To successfully cross-promote yourself with other OnlyFans models, you will need the Telegram app. Telegram is a messaging app available on smartphones, tablets, Windows, and Mac. Telegram will help you connect with additional models to do S4S with, and it is essential for doing drops, which should be the bread-and-butter of your promotional strategy. So before getting into drops, I will go over the basics of Telegram.
Temporary Phone Number
Before installing Telegram, you will want to get a temporary phone number. Telegram requires that you enter a phone number that they will text a verification code to. While you can hide the number, so users can’t see it, the app will automatically notify everyone who has the Telegram app and has that phone number in their phone’s contacts. In other words, if you use your real number, any of your friends, family, and co-workers who have your number and have Telegram will receive a notification about your new Telegram account!
So, bottom line, get a temporary number and use that when you create your Telegram account. This is not as complicated as it might sound. For example, you can use the Burner app service, or something similar. Or you can use Google Voice if you want a permanent second number - just remember to never give this number out to people you know in real life!
Setting Up Telegram
Once you have your temporary number ready, download and install the Telegram app.

Once you open the app, the first thing it will do is ask you to “please” give it permission to make and receive calls. You will have to tap OK on this box, but when you get the actual permission request, you can deny it.

Now enter your throwaway number. If it is a U.S. based number, the country code will be “1”.

Now Telegram will ask for permission to read call logs. Again, tap OK on the first box, then deny the permission.
Now the verification code will be sent. Once you receive it, enter it into Telegram in the space provided.
Now it will ask you to enter your name and upload a profile pic. Enter your model name or username in the “First name” box. You can leave the “Last name” box empty.
Telegram will now ask to access your contacts. Tap on “Not Now.”
Swipe from the left-side of the screen, or tap the 3-line button in the upper-left, to open the main menu. Click on “Settings.”
If it’s available, use the same username on Telegram that you use for your Paid account.
Now tap on “Privacy and Security” and then on “Phone Number.” Even though you are using a throwaway number, go ahead and set “Who can see my phone number?” to “Nobody” for added security.
Groups
One of the more useful features of Telegram is its ability to host group chats of up to 200,000 people!
Groups can be public or private. To join a private group, an admin for the group must create and send you an invite. To join a public group, you just need to tap on the web address for that group, such as t.me/publictestgroup and then tap “Join.” Once you join a group, it will be added to the list of your conversations and groups on the Home screen of Telegram.
When you find an important group that you will be visiting often, it is a good idea to pin it to the top of the list so you can easily find it. To pin a group or conversation, simply press and hold it for a few seconds, then tap on the pin icon that appears.
Saved Messages
Telegram has a feature called “Saved Messages” which is basically like your own private chat window where you can post messages that you want to save for later.
You can get to the Saved Messages chat by tapping on Saved Messages from the main menu.
Many models use Saved Messages to save their captions for reuse. However, this still requires you to navigate to and from another screen to retrieve the message. A much more efficient method is to save your captions to your phone’s clipboard, which I will show you how to do shortly.
Drops
At the beginning of the section, I mentioned how doing cross-promotion was the key to your success. To be even more specific, frequently doing drops with other OnlyFans models is the key to your success. I cannot stress this point enough. Doing frequent drops is the difference between making almost nothing on OnlyFans and making hundreds of thousands of dollars.
What are Drops?
Drops are very similar to S4S except that they involve multiple people all cross-promoting each other at once. Also, while S4S promos usually last for at least 24 hours, promos from drops often stay up for as little as an hour. And the most common types of drops don’t include extra pictures or videos, just the caption.
At the time of this writing, the majority of drops are coordinated on the Telegram app, in groups specifically dedicated for that purpose.
A typical drop works like this. Several models are in a drop group on Telegram. The creator of the group, or a designated admin acts as the “drop coordinator.” The drop coordinator specifies the rules for the drop and then declares the drop “open.” All the models participating in the drop message their captions to the group, then the drop coordinator declares the drop “closed.” Each model now goes onto their OnlyFans page and posts each of the other models’ captions. Then they take screenshots, or a screen recording, of their page and message that to the drop group to prove that they made the posts. After the agreed upon amount of time has passed since posting the captions, the models can then delete them from their page. This is a simplified example to give you the basics of what a drop is. I will provide a much more detailed example shortly.
Types of Drops
There are different types of drops based on the type of account being promoted and the type of account that is doing the promotion. These are Free on Free, Paid on Paid, and Both on Free.
Free on Free drops are when a group of models post links to each others’ Free accounts on their Free accounts. Paid on Paid drops are when a group of models post links to each others’ Paid accounts on their Paid accounts. Both on Free are when both types of accounts are promoted on Free accounts.
Finding and Joining Drop Groups
Finding your first drop group can be rather tricky. You will rarely find anyone posting links publicly. This is because drop groups already struggle with the issue of spam bots, and sleazy men looking for free content, trying to invade their groups.
In order to find your first drop group, you will need to network with models who already belong to them. You can look for other OnlyFans models on social media and try to find ones that mention “Telegram” or “drops” or “cross-promotion” and send them a direct message politely explaining that you’re new and asking if they know of any other drop groups for you to join.
A better strategy might be to start subscribing to other models’ Free pages on OnlyFans and looking for models who post lots of promos for other models in a row. If they do, chances are good that they are doing drops on Telegram. Not to mention it’s just a good strategy to look at what other models are doing to get ideas for yourself. As mentioned before though, don’t message these models directly on OnlyFans. Look for their social media links in their bio and message them on one of those platforms.
Also, keep in mind that, at the time of this writing, the vast majority of models on OnlyFans are unaware of the cross-promotional strategies described in this guide. So keep that in mind before you start randomly messaging other OnlyFans models asking about drop groups - most will have no idea what you’re talking about. And it’s probably not in your best interest to spread these strategies too widely. The reason these strategies are so effective is because of the fact that most models aren’t using them. So if you have a real-life friend looking to get into OnlyFans and you want to help them have a better life, by all means share this guide with them. I just wouldn’t recommend blasting it out to every OnlyFans model you meet online.
The good news is that once you find your first group, it gets much easier to find more. Models will sometimes post links to other drop groups in the chat. You can also start networking with the other models in the group and message them directly asking if they know of any other drop groups you could join.
Because of the issue of unwanted visitors I mentioned earlier, most drop groups will require verification to join. This usually consists of sending the link to your page and a screenshot of your fan count. Often, as soon as you join the group you will get a message from a bot asking for these things, and you generally only have a few minutes to send them before you are kicked from the group. So make sure you have them ready to go before you try joining a group.
Some groups have minimum fan counts to join. Keep a list of groups that you don’t qualify for yet, and join them as soon as you do. You will want to do drops in groups with the highest minimum fan counts that you can, to ensure that the models you are dropping with have high fan counts. As you get more fans, and join better groups, the number of subscribers you get per drop will go up and up!
Try to find groups that are specifically for your niche. There are groups based on age, body types, hair color, skin color, kinks, and so on. Promoting with models who are the most like yourself will get you the most subscribers, because your promotions will be seen by fans who are already into models like yourself.
Step-by-Step Example of a Drop
A typical drop might look something like this.
An admin for the group will act as the “drop coordinator.” The admin will start things off by stating the type of drop it is, when the posts should expire, and asking who’s active. So they might say something like “Who’s A for a FREE on FREE 1H?” This means “Who’s active and ready to do a drop where we post captions to each others’ Free accounts on our Free accounts, where the posts stay up for 1 hour?”
Then, if you would like to participate in the drop, you respond with a simple “A” meaning that you are active and ready to participate.
Then, the admin will usually state when the drop will begin and the format that the caption should be in. So they might say something like “FREE on FREE drop starting in 2 minutes. Format - emoji cap emoji free link.” This means that the caption you create for the other models to post should start with an emoji, then a short message promoting yourself (cap stands for caption, and in this case refers to the main text part of the caption), then another emoji, then the link to your Free account. Most drops will require a specific format, but some will not.
Then the admin will message the group that the drop has started and they will message their own caption first. As soon as they do so, you should message your caption as quickly as you can. The higher your caption is among the group, the better chance you have to be seen amongst the group. I highly recommend you save your captions to your phone’s clipboard so you have them ready to insert at any time. I will show you how to do this shortly.
At some point, the admin will close the drop. Once this happens, it’s time for you to copy and paste each model’s caption from Telegram into posts on OnlyFans. The drop coordinator will specify if captions should be posted top to bottom or bottom to top. For example, if it’s bottom to top, you would copy and paste the last caption posted in the Telegram chat to your OnlyFans page first, and then work your way up.
Each caption should be its own post, except in Paid drops where the drop coordinator will often take the additional step to combine the captions together by twos and resend them to the group. This way, you post two captions per post and reduce the total number of posts you make for the drop by half. In these situations, you will need to make sure to remove your own caption from the bundled post before you post it to your page. If there is an odd number of models in the drop, there will be an “extra” caption that should be used to replace your caption.
Even if the posts are meant to be deleted in as little as an hour, you should set them to expire in 24 hours, just in case you forget to delete them manually.
Then, the admin will ask for screenshots (SS), or a screen recording, of the posts you made for the drop to prove that you actually posted them and that you didn’t miss anyone. I will teach you how to efficiently take screenshots and screen recordings shortly.
After you and the other models send your screenshots, the group verifies them, and that every model sent theirs. If one of the models doesn’t send theirs, the drop coordinator will instruct the group to delete that model’s link from your pages. Once everyone’s posts have been verified, the drop coordinator will declare the drop over.
Once the specified amount of time has passed (in this case, 1 hour) you should delete the posts so your page doesn’t get cluttered with captions. Don’t be tempted to delete the posts earlier than you agreed. This is known as “dirty deleting” and you will be quickly caught and banned from all cross-promotional groups!
So that’s a basic example of a drop. My advice when joining a group is to just watch a drop or two to get familiar with it before you actively participate in one. This also gives you a chance to see other models’ captions and get ideas for what you want to say on yours.
How Often to Drop
There is a lot of debate over how often a model should do drops to maximize their subscriber counts. On one hand, the more drops you do, the more people will see you and the more you will gain subscribers. On the other hand, the more drops you do, the greater the chance of your existing subscribers getting annoyed by all the advertising, and the more potential you will have to lose subscribers.
There does seem to be a general consensus, however, that whatever the right amount is, it’s probably higher for your Free account than it is for your Paid account. The reason being that people who are getting the content for free will be much more willing to receive advertising before it annoys them to the point of unsubscribing.
I honestly don’t have enough data to tell you with full confidence what the exact right amount is. So you should consider experimenting with different amounts until you find the one that gives you, on average, the largest net gain of subscribers per month. But, if you need a starting point, my recommendations would be as follows:
For your Free account, try not to have more than 20 captions up at once. So, for example, after you did one 20-caption drop, or two 10-caption drops, or three 6-caption drops, you would wait until you can delete some of the captions before doing another drop. Because most free drops have only 1-hour post times, and because you only have time to do maybe 2-3 drops per hour, you may actually find it difficult to hit the 20-link limit even when you’re trying to do as many drops as possible.
For your Paid account, I would recommend no more than 5 drop posts up at once (because Paid drop captions are usually doubled-up, there would be 10 captions in those 5 posts).
If you find it easy to generate lots of content, you can get away with doing more drops, if you post enough content in between each drop.
Testing Your Captions
Remember that long list of restricted words from earlier? Make sure your captions don’t contain one of those words! If they do, you will throw a wrench into the drop you are participating in and frustrate a lot of other models.
Don’t try to memorize the list or cross-reference it every time you write a caption. Instead, the best way to be sure your caption is free of restricted words is to do a test post first. After you’ve typed out the caption, but before you post it, copy it (if it does contain a restricted word, you will lose all the text and have to type it all again, instead of editing just the one word). Then, post the caption to one of your OnlyFans accounts. If you don’t get any warning about a restricted word, and the post goes through, you can then delete it immediately.
Anytime you create a new caption, test it first before trying to use it in a drop!
Saving Captions To Your Clipboard
You should always save your captions to your phone’s clipboard after you’ve tested them. This way, you only have to create them once and they are always ready to go to whenever you need them, without having to navigate to a different screen.
On Android devices, you can use the clipboard that comes with Gboard, the native keyboard on Android phones. If you have an old Android that doesn’t have Gboard, you can download it from the Google Play store.
To use the clipboard, go into any messaging app and act like you are going to send a message so that the keyboard pops up. Then click on the clipboard icon at the top. If you don’t see it, you will need to click on the > icon in the upper-left to expand the menu.

If the clipboard has not been activated, click the blue button that says “Turn on Clipboard.”

Now, when you press and hold on a message, you will have the option to select and copy it. Now when you tap on the clipboard icon, you will see that message saved in your clipboard. For your captions, you should click on the pencil icon, select the caption, and then click on the pin icon to pin it to the top of the clipboard.

Now, all your captions will be pinned to the top of your clipboard, ready to be inserted at any time.
For iPhones, in order to save multiple items to the clipboard, you will need to download a clipboard app such as Copied .
How to Take Screenshots
To quickly take a screenshot on most Android phones, press the Power and Volume Down buttons for a few seconds. If this doesn’t work, Google how to do it with your specific brand of Android phone. To take a quick screenshot with an iPhone earlier than an iPhone X, press the Home and Lock buttons. For the iPhone X and later, press the Home and Volume Up buttons. You will likely have to take and send several screenshots in order to capture all of the posts in the drop.
As an alternative, you may find it easier to take and send a single video of you scrolling through all of the posts. On iPhones, you can enable the screen recorder feature by going to Settings > Control Center > Customize Controls and then tapping the green plus button next to “Screen Recording.” Then, whenever you need to record the screen, just swipe up from the bottom of the screen on older iPhones, or swipe down from the top-right corner on the iPhone X or later, and tap on the Screen Recording button that is a circle within a circle. Samsung and LG phones using Android 10 and later can quickly record video by swiping down twice on the notification shade to access the Quick Settings, and then selecting “Screen Recording.” For other Android phones, you can download a screen recorder app from the Play store.
Other Types of Drops
The drop example shown earlier represents the most common type of drop, but some drop coordinators get creative and do other forms of drops. Here are brief descriptions of some of those:
flyer drop - This is where each model creates a very short caption (generally just one line long) and submits a promotional photo with it (this is the “flyer” that the name refers to). The drop coordinator combines everyone’s caption into a single post, and then each model posts that on their page, including all the other models’ pictures in the post.
scheduled drop - This is similar to a regular drop except you queue each of the models’ captions to post at different times, usually between 10-30 minutes apart, depending on how many models are participating in the drop. These can be very effective because each model’s caption gets a chance to be on top for a certain amount of time.
monthly drop - This is where 30 models promote just one of the models in the group at once, with a different model getting promoted each day. For example, on day 1, all 30 models promote model 1. Then on day 2, all 30 models promote model 2, and so on, until all models in the group have been promoted.
In general, just like your first time with a regular drop, any time you encounter a new type of drop, I recommend just watching at first until you fully understand how they work. And look for any pinned messages at the top of the chat that explain what the rules are.
Starting Your Own Drop Group
This is a strategy for the future. For now, you should concentrate on getting comfortable doing drops. But eventually, once you understand drops inside and out and can do them in your sleep, you may want to consider starting and running your own drop groups. This has several advantages:
- The drop coordinator always gets their caption on top, which increases their chances of being seen by the other models’ fans.
- A drop coordinator has the luxury of doing a drop anytime they want, instead of having to wait for someone else to start a drop.
- You can create specialized groups that fit your specific niche.
Summary
Congratulations! By learning the techniques in this section, you are now ready to rapidly gain subscribers! The next section will teach you how to squeeze the maximum amount of revenue out of each subscriber.
Strategies to Maximize Your Revenue

PPV Posts
Pay-per-view (PPV) posts are posts that subscribers must pay to unlock. Creating a PPV post is the same as creating a regular post, except that at some point, you tap on the price tag icon  and set a price. The minimum price you can charge for a PPV post is $3.
PPV posts are the main way to get revenue from your Free subscribers. There are lots of people who just don’t like committing to subscriptions, yet will gladly shell out money regularly to buy your content individually! I recommend doing a PPV post for every 3 regular posts you do. For PPV posts, you can just use the same content you post publicly on your Paid account. While you can’t post nudity publicly on your Free account, if you put it in a PPV post, you can post the same things you can on a Paid account.
I don’t recommend doing PPV posts on your Paid account. Some fans that are paying a subscription to see your content will be put off by the idea of being asked to pay more to see all of it and unsubscribe. If you do decide to make PPV posts on your Paid account, do it very sparingly, and keep an eye on the number of people who unsubscribe that month to see how much of an effect it has.
Welcome Messages
You can configure a welcome message to be sent out automatically to a subscriber as soon as they subscribe. To set a welcome message, go to Settings -> Chats (the envelope icon). Then, tap the switch where it says “Welcome Message For New Fans” to turn it on, and enter your message in the box below that. When you have finished the message, tap the Save button to save it.
Ideas of things you can say in your welcome message are:
- thank them for subscribing
- ask how they are doing
- ask what kinds of things they are into
- ask if they have any custom requests
- say you look forward to getting to know each other better
For your Free account, you should also include a PPV and say, for example, “Here’s a video of me taking a shower! Let me know if you like it!”
Also, you should start a conversation with those who respond back. Try to steer the conversation towards making a sale. For example, you can ask them what kinds of things they are into, and then say “Oh! I actually just made a video of that. Here it is, if you’re interested.” and then send them a PPV message of that video.
If they send you a dick pic, respond with a PPV pic or video. If they start trying to sext for free, tell them your price for 10 minutes of sexting, or just send them a paragraph of dirty talk in response with a $3 lock.
Mass DMs
It is possible to send a direct message (DM) to all of your subscribers at once. Click on the 4th button on the main toolbar (the one that looks like a chat bubble) to go to the Messages screen. Then click on the + icon in the upper-right. Then check on the box that says “Fans” and tap on the Next button. You can now compose the message.
Mass DMs should be used the same way as your welcome message. Include a PPV and/or use the message to initiate a conversation that leads to a sale. You generally only want to use mass DMs on your Free account. Your Paid fans might expect to get a lot of conversation and sexting at no additional charge.
For the messages that include PPV, just pitch the PPV content you have included. For the messages just meant to get engagement, just asking a simple question is a good way to get people to message you back. For example, “Hey. How are you?” or “What are some of your favorite movies?” or “What are your favorite sex positions?” etc.
For the DMs with PPV, you can entice them to purchase by offering something for free when they do so. For example, a free dick rate, free sexting for 10 minutes, additional pics and videos for free, etc.
Another strategy is to send a mass message asking for tips as part of a fundraiser to buy things. These can be things relating to your modeling, such as makeup, lingerie, sex toys, etc. but they don’t have to be. You can say things like “Trying to save for a PS5! I’m so close!” Guys love to be the hero and come to the rescue.
As far as how often to do mass DMs with PPV, I would recommend scheduling them to go out at least once a day (again, only on your Free account). I recommend you only use the strategy of getting sales through conversation often if you are good at converting them into sales quickly and you find it is an effective use of your time.
Note that you can schedule mass DMs the same way you schedule posts, by clicking on the Schedule icon (see Scheduling Posts). I recommend scheduling a week’s worth at a time, the same day you schedule your posts for the week.
And finally, be careful not to waste too much time when chatting with your fans. Many of them will be happy to chat with you forever without ever buying anything. If you notice you’ve been devoting a lot of time chatting with someone who doesn’t buy anything, consider either slowing down your response times or letting them know they will have to tip you for more of your time.
Custom Requests
Another source of revenue from both your Free and Paid fans is custom requests. This is when a fan messages you asking for specific content. If it’s something you’re willing to do, you then tell them the price, and if they say no, you can choose to negotiate or stay firm. If they agree, then they should tip you the amount upfront. Then you make the content and message it back to them, ideally within a few days of them paying. If you expect it will take you longer than a few days before you can fulfill their request, you should let them know upfront.
Because you are making content custom for just one person, the price should be a lot higher than you would charge for that same content in a PPV. If the fan is used to buying custom content, they will know this and be okay with it. For example, I would charge at least $5 per minute of custom video (i.e. $50 for a 10-minute video).
One strategy for getting even Paid subscribers to pay for custom videos is to reserve some types of activities and/or kinks for just that purpose. For example, if you do anal, you might decide to never post anal on your page, and instead wait for fans to message you asking if you have any anal content. Unless they ask for specifics, you can sell the same anal video as “custom content” for a high price to everyone who asks. Keep in mind, however, that the more variety of content you have on your Paid page, the easier it is to get and maintain subscribers. So you will have to decide for yourself if and how you employ this strategy.
IP and Geo Blocking Settings
Go to Settings > Security (the shield icon), scroll down to where it says “IP and Geo Blocking” and make sure there aren’t any countries listed that you didn’t add yourself. I’ve heard from more than one model of an apparent software bug suddenly adding the United States to the list of blocked countries! If people start complaining that they’re getting a “Page Not Found” message when going to your page, or if you ever notice a sudden drop in the amount of new subscribers you’re getting, check this setting again to make sure that hasn’t happened.
Additional Tips
- Promote your Paid account on your Free account. I recommend making a post pitching your Paid account for every other 3 posts you make.
- Offer a discount for the first month to new subscribers. Open the main menu and go to Promotions. Tap the button that says “Add a Promotional Campaign.” On the Discount tab, set your desired discount percentage, the expiration date of the campaign, and the number of discounted subscriptions you would like to provide. If you add a message, to advertise the promotion, it will appear on your profile to potential fans before they subscribe.
- Offer special content for people who subscribe to your Paid page and advertise this fact in your bio and in your captions. For example, you can set up a welcome message for your Paid account that automatically sends one of your best videos to all new subscribers. Another popular strategy is to offer a free dick rate with subscription.
- Register an account at AllMyLinks, so you can display all your social media links in one place, using just a single link. Put that link in your Onlyfans account bio, so potential fans who don’t subscribe right away have a chance to see more of you before subscribing.
- Subscribe to your fans who don’t renew their subscriptions. By subscribing to them, you will still be able to DM them with PPVs and they can continue to be a source of revenue for you.
- Try changing your profile pic every so often. As you do more and more drops, your chances increase that you will be advertised to some of the same people more than once. If they didn’t subscribe the first time around, there might be something about a different pic of you that draws them in.
- Don’t show your fan amount on your profile. If you don’t have a lot of fans, potential subscribers might assume you don’t have good content. If you have a lot of fans, some potential subscribers might actually be put off by your popularity. This should be set to off by default, but if it’s not, go to Settings > Privacy and Security (the shield icon) to turn it off.
- Also in Settings > Privacy is an option to show your media count. I recommend leaving this off when you first start. Once you have over 200 photos and over 50 videos posted, I would turn this setting on.
- Don’t forget to put aside a large chunk of your earnings for taxes! In most jobs, your taxes will be taken out of your paycheck for you by your employer. As an independent contractor, this will not be the case - you are responsible for paying your own taxes.
Summary
You now know everything you need to know to embark on your new career on OnlyFans and become one of the top models on the site! Now get out there and make a buttload of cash!
